
Build Your Own AI Voice Assistant: Step-by-Step Python Tutorial | AI Valley Zirakpur
Welcome to another exciting hands-on project! At AI Valley in Zirakpur, students build amazing, real-world applications just like this every single week. If you have been searching for the best coding classes for kids in Zirakpur or just want to learn practical Python programming in the Tricity area as an adult, you are exactly in the right place. Today, we are going to step into the thrilling world of Artificial Intelligence by programming our very own Virtual Voice Assistant, similar to Amazon's Alexa, Apple's Siri, or Google Assistant.
Building an AI from scratch might sound like complex magic, but with Python, it is incredibly logical, highly accessible, and incredibly fun. By the end of this tutorial, you will have a working desktop assistant that can listen to your voice, speak back to you, tell you programming jokes, and even play your favorite songs on YouTube!
🤖 Why Use Python for AI?
Before we dive into the code, you might wonder why we are using Python. Python is the world's leading programming language for Artificial Intelligence and Machine Learning. Its simple, readable syntax makes it perfect for beginners, while its massive ecosystem of open-source "libraries" (pre-written code blocks) allows developers to accomplish complex tasks—like speech recognition—in just a few lines of code.
🎯 What You Will Build
You will build a fully functional Python script that utilizes your computer's built-in or external microphone to process human speech. We will program logical rules to make the AI respond to specific voice commands. This is exactly the kind of engaging, confidence-building software project our students tackle to understand how modern technology works behind the scenes.
📋 Prerequisites & Materials
Before we begin coding, let's gather our digital tools.
Python Installed: Ensure you have Python 3.10 or higher installed on your computer. You can download it from Python.org. Code Editor: We highly recommend Visual Studio Code (VS Code) or PyCharm for this project. Microphone: A working built-in laptop mic or a plug-in external microphone. Internet Connection: Required to download the initial libraries and for Google's speech recognition engine to fetch data.
Pro Tip: If you do not have a computer setup at home, you can always visit our AI Valley lab where all high-tech materials and computers are provided. We are the premier destination for STEM education and robotics training in the Tricity area!
---
Step 1: Setting Up Your Python Environment
To make our Python script listen to our voice and speak back, we need to bring in some special tools called "libraries." Think of libraries as digital toolboxes created by brilliant programmers from around the world that we can borrow for our own projects.

A close-up of a computer screen showing a terminal window running Python pip install commands with a dark theme background.
Open your computer's terminal (Command Prompt on Windows, or Terminal on macOS/Linux) and type the following command to install the required libraries:
What this code does:
SpeechRecognition: Helps Python understand and transcribe what you are saying.
pyttsx3: An offline Text-to-Speech library that gives your AI a synthesized voice.
pywhatkit: A fantastic library that lets us automate web browsers to play YouTube videos.
pyjokes: A fun library packed with nerdy programmer jokes.
pyaudio: The technical audio engine that connects Python to your computer's physical microphone.
🛠️ E-E-A-T Troubleshooting Tip: PyAudio Installation
Experience tells us thatpyaudio can sometimes be tricky to install!
On Windows: If you get a terrifying red error message when installing pyaudio, don't panic! Try running pip install pipwin followed by pipwin install pyaudio.
On macOS: You will need a tool called Homebrew. First, run brew install portaudio in your terminal, and then run pip install pyaudio.Once your terminal says "Successfully installed," you are ready to write some Python code!
---
Step 2: Giving Your AI a Voice (Text-to-Speech)
Now, let's open our code editor, create a new file named assistant.py, and give our AI the ability to talk. This is exactly the kind of interactive, rewarding project our students in our AI classes for kids in Mohali and Panchkula build during their weekend bootcamps!
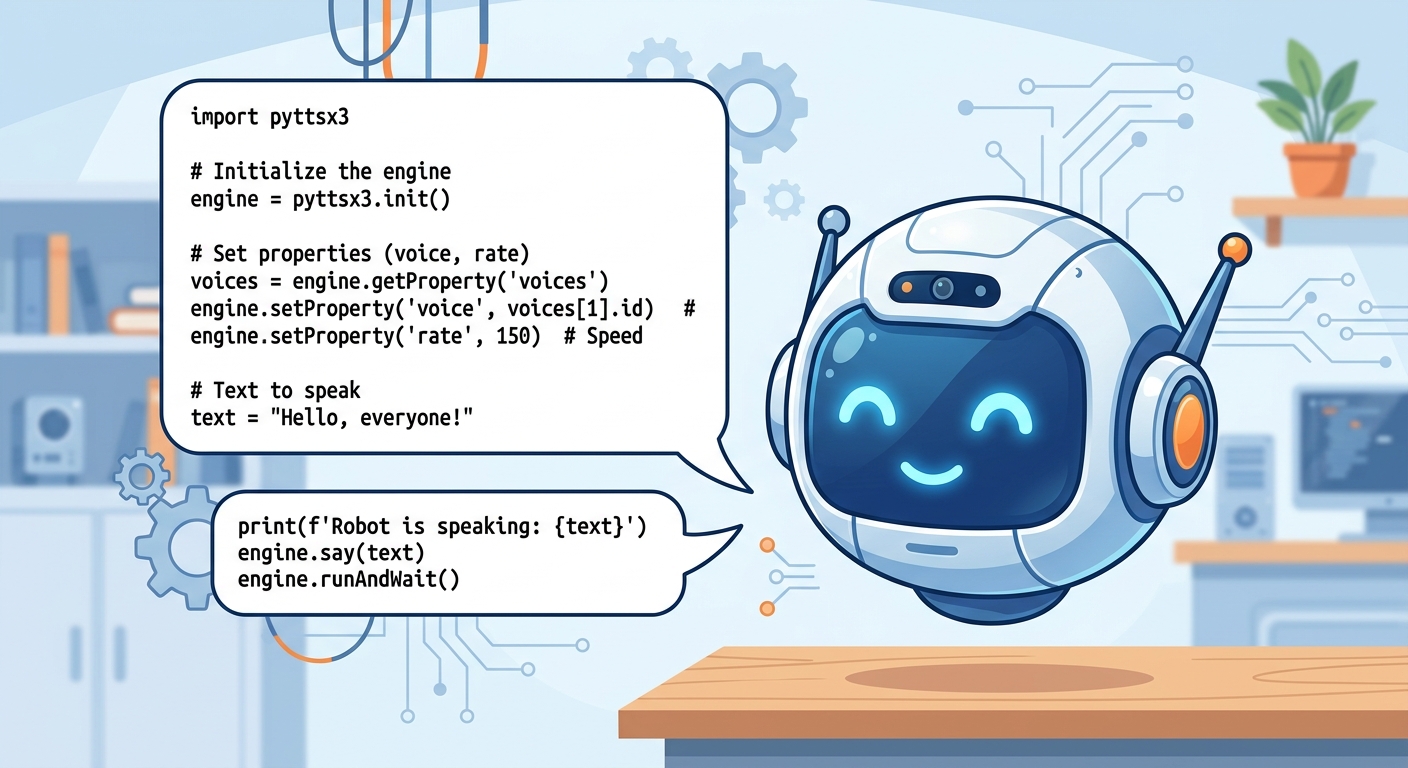
A graphical illustration showing a robot head with speech bubbles displaying Python text-to-speech code.
What this code does:
First, we import pyttsx3 and initialize the engine. We then access the computer's built-in speech properties to slow down the speaking rate slightly so it sounds more human. Next, we access the system's voices and set it to voice [1], which is usually a female voice (use [0] if you prefer a male voice). Finally, we define a reusable function called talk(text) that we can trigger anytime we want the AI to say something out loud.
Expected Output: When you save and run this script, you will hear your computer clearly speak the greeting message through your speakers!
---
Step 3: Making Your AI Listen (Speech-to-Text)
An assistant isn't very helpful if it can't hear your commands. Let's use the SpeechRecognition library to access your microphone securely and convert your spoken words into text data that Python can read.
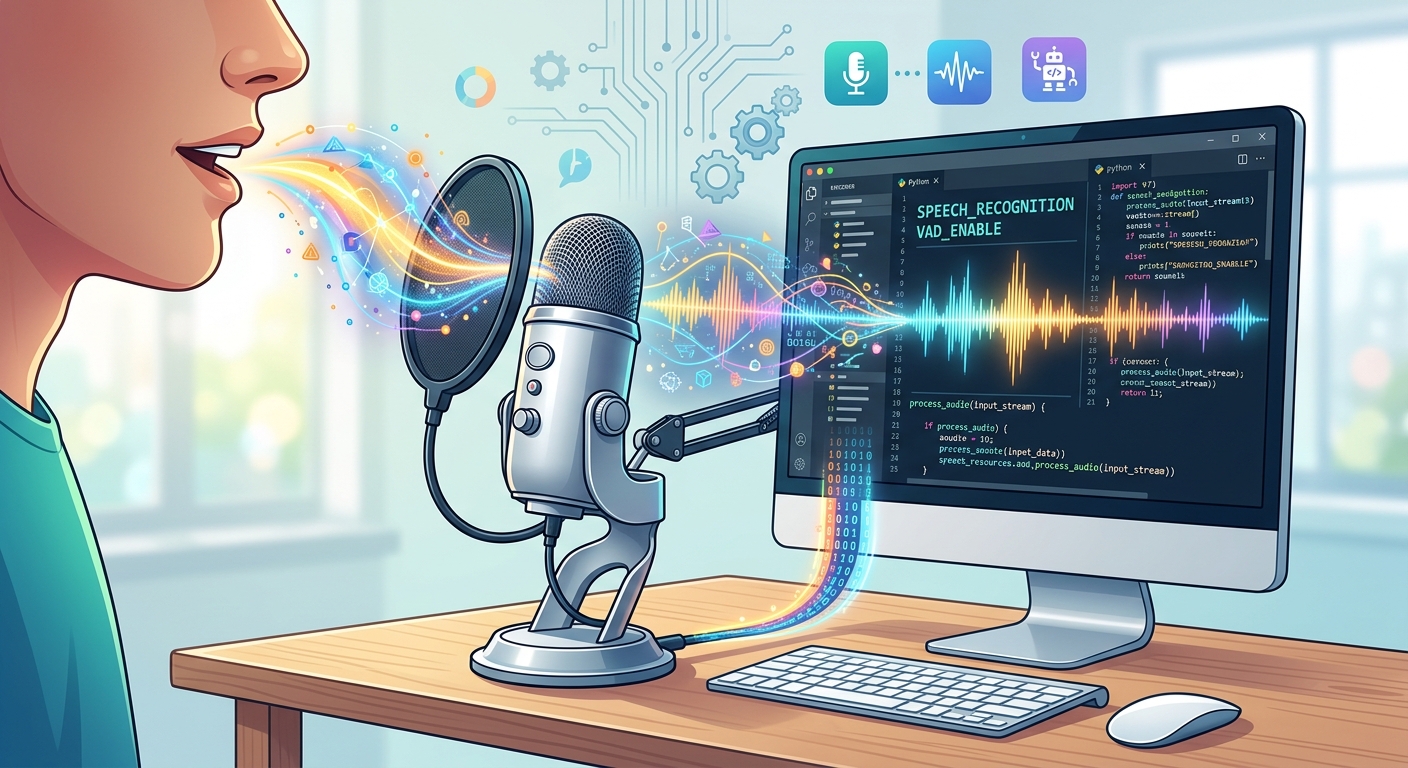
A colourful abstract visualization of sound waves representing a computer listening to human voice input through a microphone.
What this code does:
We created a robust take_command() function. The with sr.Microphone() as source: line securely activates your microphone. We use adjust_for_ambient_noise so the AI ignores the hum of ceiling fans or air conditioners. Then, recognize_google(voice) sends the audio snippet to Google's highly accurate free speech recognition engine, returning your words as a text string.
We included try/except error-handling blocks. This is a crucial professional coding standard we teach; it ensures our program doesn't crash if it hears mumbling or if the internet disconnects.
Expected Output: When you call this function, the terminal will print "Listening for your command...". If you say "Hello AI", the terminal will print "You said: hello ai".
---
Step 4: Building the AI Brain (Logic & Commands)
Now we have an AI that can hear and speak. It is time to give it a brain! We need to write conditional rules telling the AI
what to do when it hears specific keyword phrases. When parents search for a premier coding institute near me Chandigarh, this is the exact type of logical thinking and algorithmic problem-solving they want their children to master.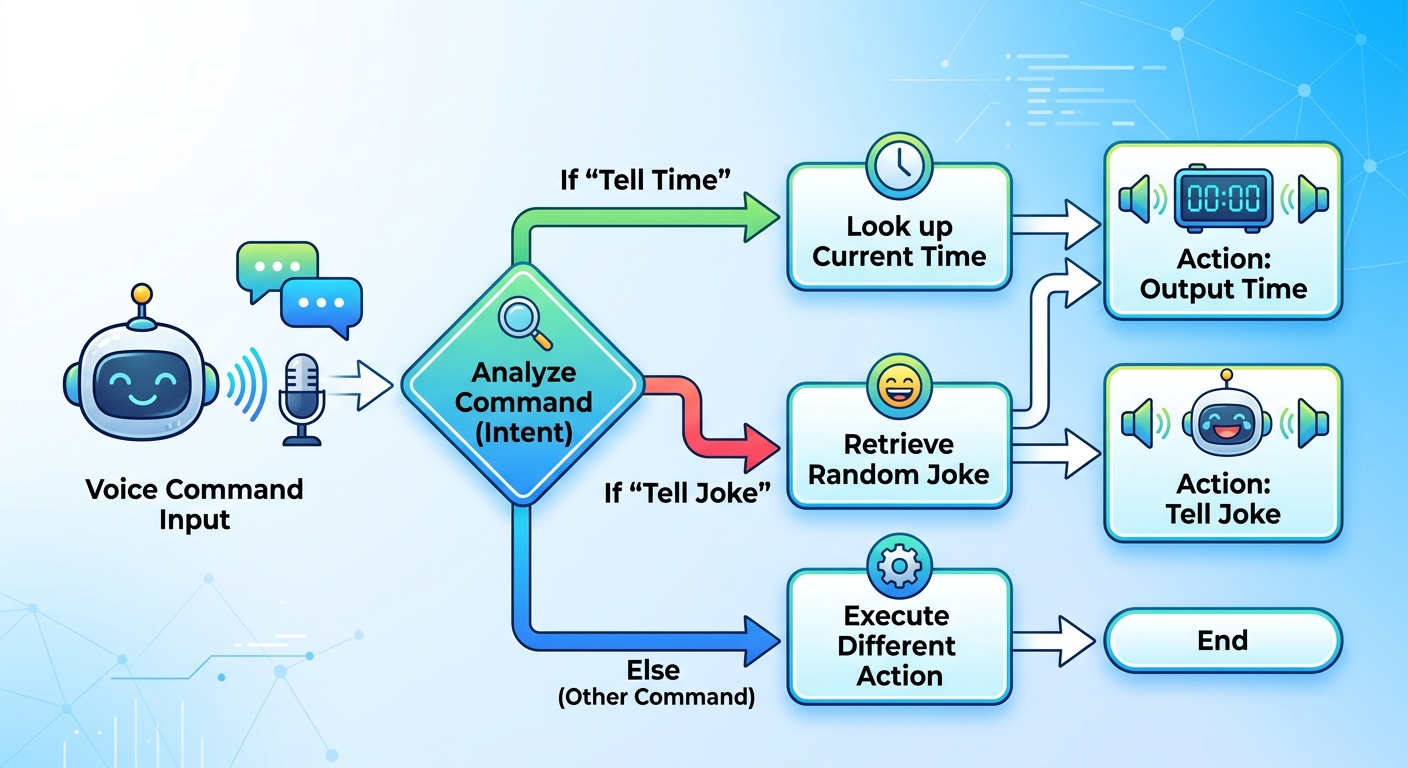
A flowchart graphic showing how an AI processes voice commands using if/else logic to output specific actions like telling the time or telling a joke.
What this code does:
Inside run_assistant(), we built an if-elif-else logic ladder.
pywhatkit opens your default web browser, searches YouTube for the song, and plays the first result automatically!
If you ask for the "time", the datetime library fetches the current computer system time and formats it neatly.
If you ask for a "joke", pyjokes grabs a random, family-friendly tech joke.
If you say "stop", the function returns False, which we will use in our final step to shut down the AI loop safely.---
Step 5: Putting It All Together in a Continuous Loop
For our final step, we need to make sure our AI keeps listening to us continuously, rather than just running once and abruptly shutting down. We accomplish this using a while loop. Understanding loops is a foundational programming concept and a massive part of our comprehensive Python curriculum.
Let's assemble the entire codebase into one final, polished script.
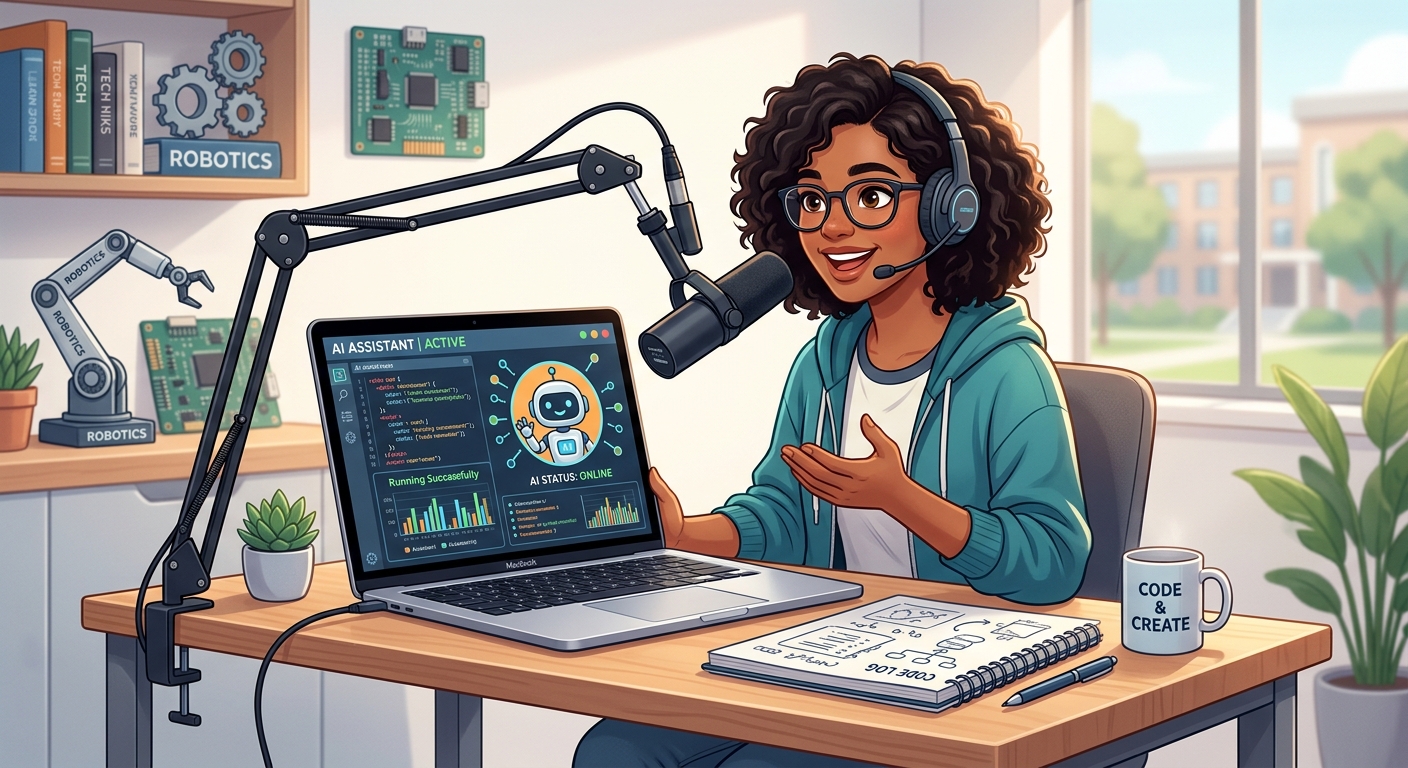
A happy student sitting at a desk with a laptop, speaking into a microphone with their newly coded smart AI assistant running successfully on the screen.
What this final code does:
This is the complete, production-ready script! Notice how we added a "wake word" feature (if 'alexa' in command). If you say "Alexa, play Believer", the script intelligently strips "alexa" from the text and just processes the command "play Believer".
The while True: loop at the very bottom is the heart of the assistant. It keeps the script running endlessly. It calls run_assistant() over and over until you finally say "stop", which breaks the loop and cleanly closes the program.
Expected Output: The AI will confidently announce "Systems online. I am listening for your commands." and patiently wait. You can keep asking it the time, asking for jokes, or commanding it to play songs until you finally tell it to stop!
---
🎉 Final Result & Next Steps
Congratulations! You have successfully built a functioning Artificial Intelligence Voice Assistant entirely from scratch using Python! You have just learned how to integrate third-party APIs, handle hardware audio inputs securely, generate text-to-speech, and apply conditional logic gates to control software behavior. These are exactly the real-world skills professional software engineers and AI developers use every single day.
🚀 Challenge: Take It Even Further
Want to make your AI even smarter? Try implementing these bonus challenges on your own:
wikipedia Python library (pip install wikipedia) and program your AI to fetch and read out two-sentence summaries of famous people or historical events whenever you say "Who is..." or "What is..."🏫 Code the Future with AI Valley
Are you ready to turn your passion for technology into a superpower? AI Valley is the top-rated coding and robotics educational institute serving students across Zirakpur, Chandigarh, Mohali, and Panchkula. Our expert instructors teach thrilling, hands-on projects just like this one every week.
Whether your child is 7 or 17, or you are an adult looking to radically upgrade your tech career skills, we have the perfect custom learning path for you. From our highly sought-after robotics and IoT training, to professional Python mastery, and engaging beginner game development classes, we empower the tech creators of tomorrow.
Looking for the most innovative coding education the Tricity has to offer? Visit [aivalley.co.in](https://aivalley.co.in) today or check out our comprehensive courses online to book a free trial class! Join the AI Valley family and let's build the future of technology together.