
Build a Custom QR Code Generator GUI: Step-by-Step Python Tutorial | AI Valley
Welcome, young coders, parents, and tech enthusiasts! At AI Valley in Zirakpur, our students build amazing, real-world tech projects just like this every single week. Whether you are typing your first line of code or you already have a few software projects under your belt, creating applications that you can actually use in your daily life is incredibly rewarding.
If you've been searching for the best coding classes for kids in Zirakpur or the wider Tricity area, you likely already know that practical, hands-on learning is the most effective way to master programming. Instead of just reading boring theory, today you will write Python code that turns any website link, hidden message, or digital portfolio into a scannable QR code!
Let's get our hands dirty and build something awesome today!
🎯 What You Will Build
You are going to build a standalone desktop application using Python. The app will feature a custom-styled, dark-mode graphical interface where you can type in any text or URL, click a "Create QR Code" button, and instantly see a generated QR code right on your screen. Best of all, you can immediately scan this code with your smartphone camera!
This is exactly the kind of interactive, logic-building project our students tackle during their curriculum at AI Valley. By the end of this tutorial, you will have learned how to build user interfaces, generate matrix data, and handle images in Python.
📋 Prerequisites & Materials
To build this project, you will need a few simple tools. If you don't have a computer at home, don't worry—visit AI Valley's tech lab where all necessary high-end materials are provided for our students!
- Python 3.8+: Make sure Python is installed on your computer. You can download it for free from python.org.
- Code Editor: We recommend Visual Studio Code (VS Code), PyCharm, or Python's default IDLE.
- External Libraries: Standard Python doesn't know how to draw QR codes out of the box, so we need to install two helper libraries. Open your computer's terminal (or command prompt) and type the following command:
pip install qrcode pillow
- qrcode: The library that mathematically calculates and generates the 2D QR code matrix.
- pillow (PIL): The Python Imaging Library, which acts as a bridge to allow our app to process and display PNG image files on the screen.---
Step 1: Setting Up the Main App Window
Every great desktop application starts with a sturdy window. In Python, the most popular built-in library for creating Graphical User Interfaces (GUIs) is called tkinter. If your goal is to master Python and transition from writing text-only console scripts to building real software, learning tkinter is a massive stepping stone.
In this step, we will import our library, create the main application window, give it a title, and set a modern dark-themed background color.
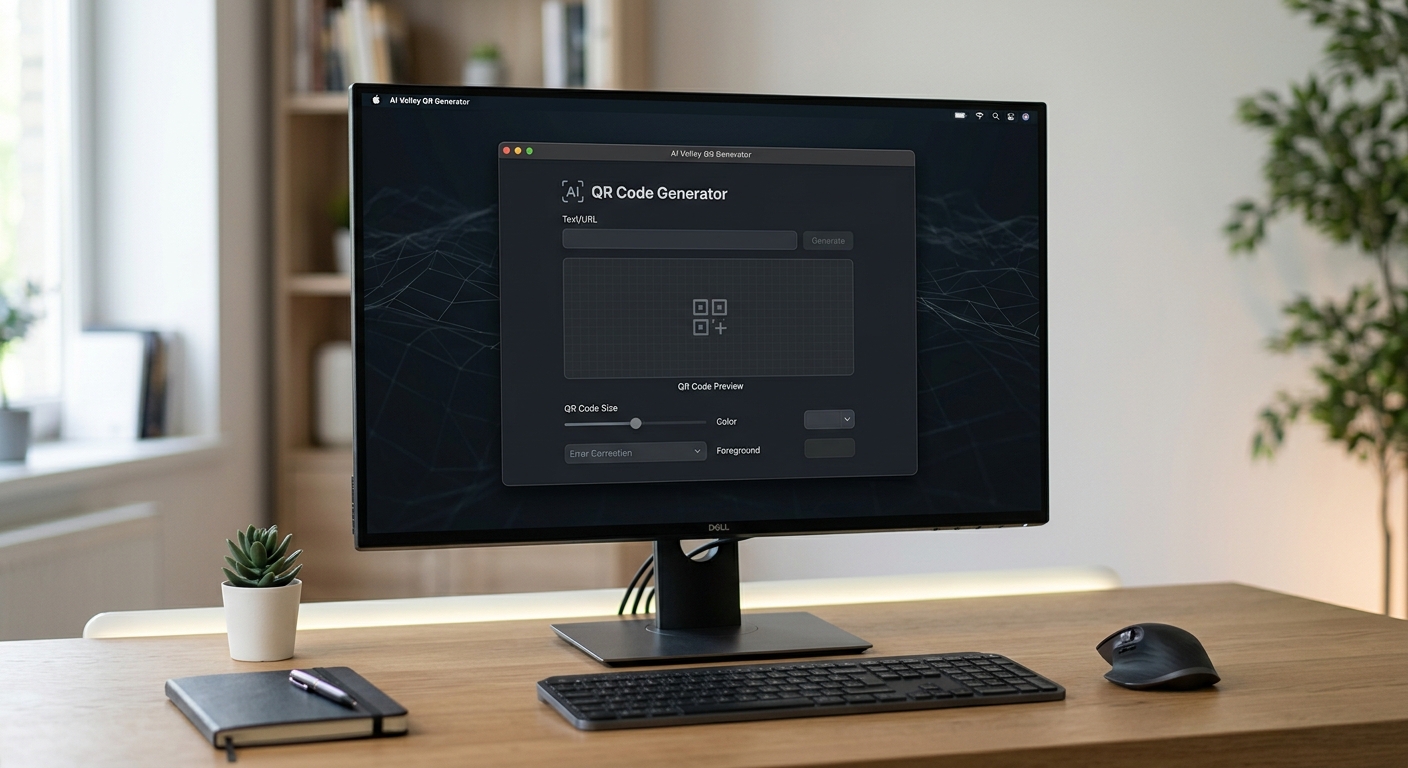
A clean, dark-themed empty graphical desktop window with the title 'AI Valley QR Generator' at the top left.
🧠 How It Works:
We start by bringing thetkinter toolset into our project using import tkinter as tk. We then create an object called window. Think of this window as the blank canvas for our app.We resize the canvas to exactly 400 pixels wide by 550 pixels tall, and change the background color using a standard web Hex Code (#1e272e). Finally, window.mainloop() is a critical command: it tells Python to keep the window open in an infinite loop, constantly listening for user interactions like mouse clicks or keyboard presses.
Run this code, and a blank, dark-colored window will pop up on your screen!
---
Step 2: Creating the User Interface (UI) Elements
Now that we have a canvas, it is time to add our widgets! "Widgets" are the individual elements—like buttons, text boxes, and labels—that users interact with. This user-centric design thinking is a core focus in our AI classes for kids in Mohali and surrounding areas.
We need three main widgets for our app:
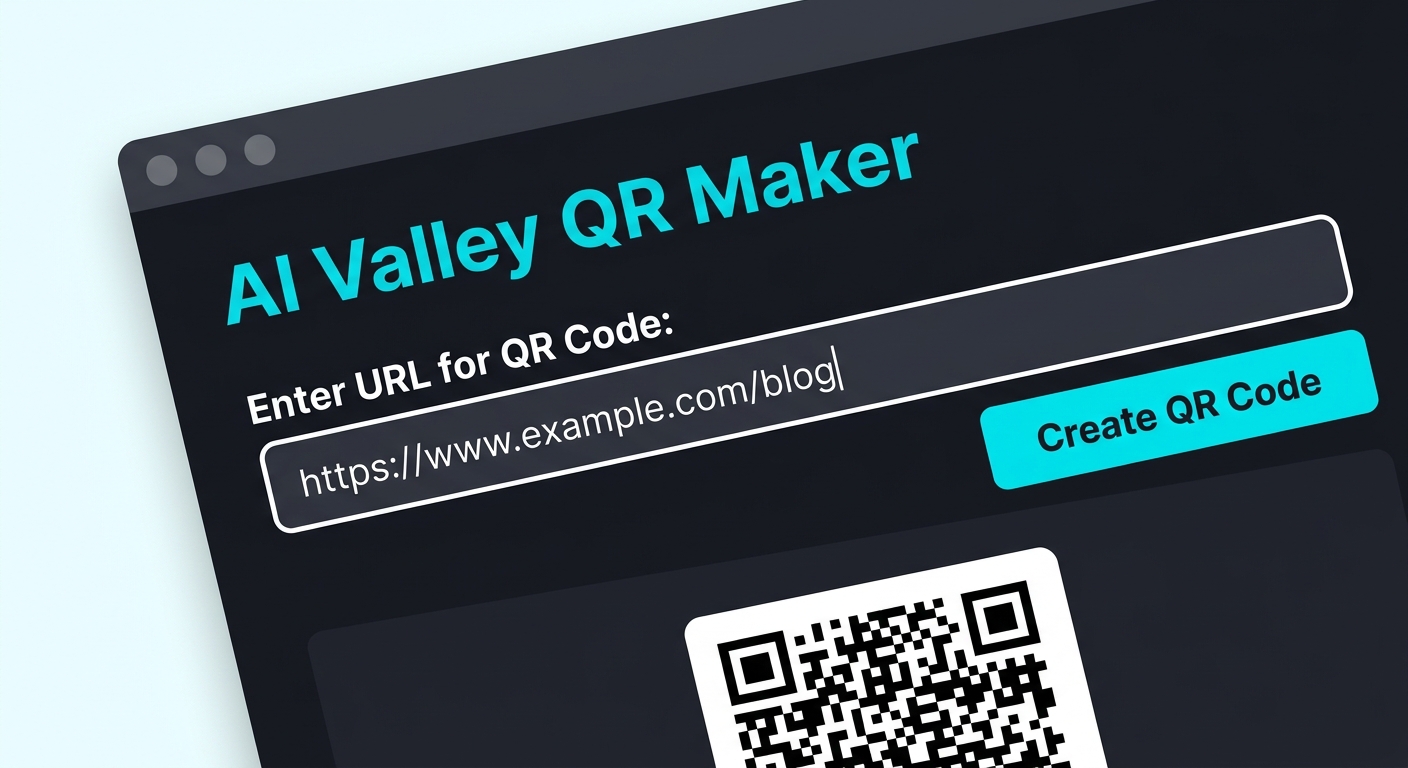
A close-up of the Python GUI showing a teal title text, a white input box for URLs, and a bright teal 'Create QR Code' button.
🧠 How It Works:
We usetk.Label to create static text on the screen, customizing the font and colors (fg stands for foreground/text color, while bg is the background color). tk.Entry creates a single-line text box where users can type. tk.Button creates a clickable button.You will also notice the .pack(pady=20) command. Tkinter has different ways to place widgets on a screen (like grid or place), but pack() is the simplest. It stacks widgets vertically, perfectly centered. The pady argument adds vertical "padding" (spacing) so the UI elements don't look squished together.
---
Step 3: Writing the QR Code Generation Logic
An app that looks good but does nothing isn't very useful! Now, we will connect the "brains" of our application. We are going to write a Python function that takes whatever the user typed into the box and converts it into a QR code image using the qrcode library.
Expanding STEM education across the Tricity means helping students understand how data works under the hood. A QR code is essentially just text data translated into a 2D mathematical grid of black and white squares!
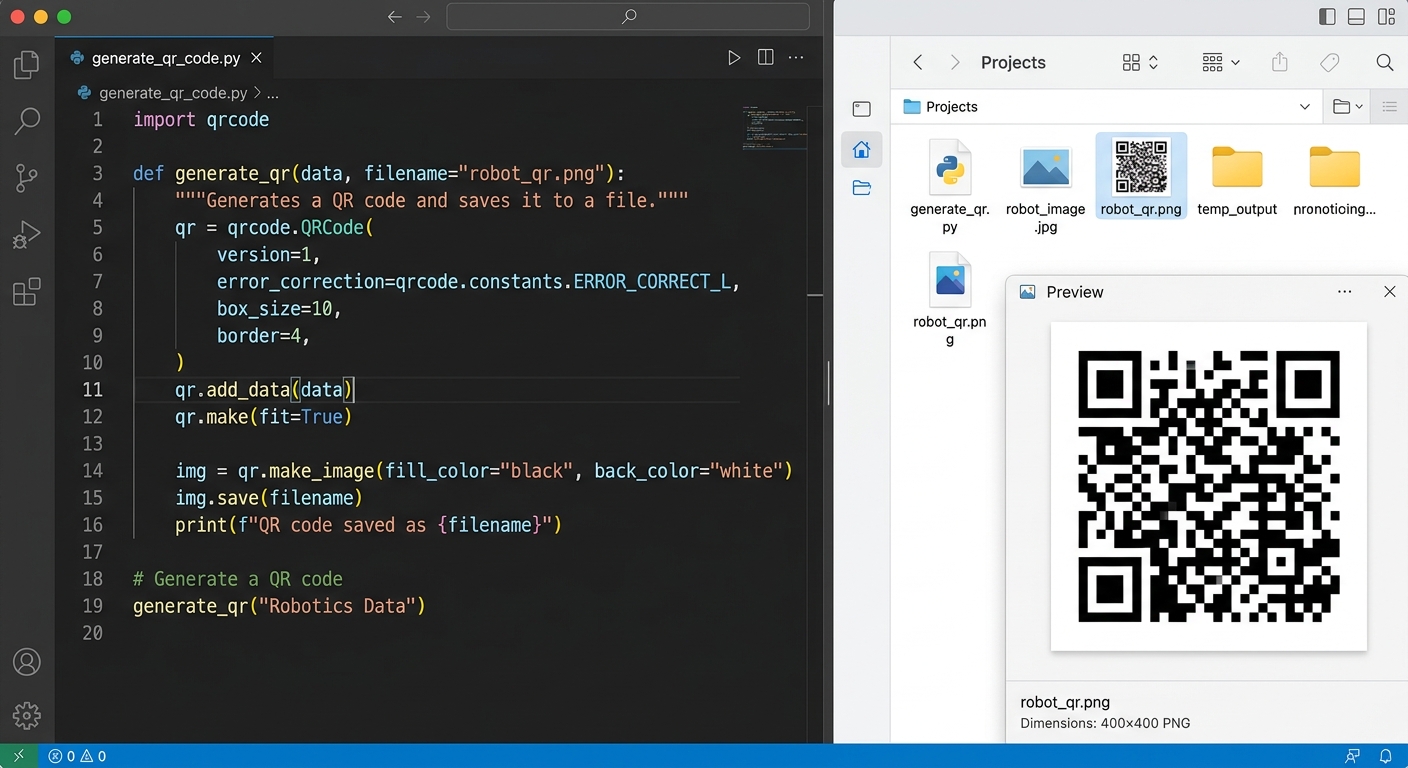
A split screen showing the Python code editor defining the generate_qr function, and a temporary black-and-white QR code saved in the file explorer.
🧠 How It Works:
We define a custom function calledgenerate_qr(). Inside, it grabs the text from link_entry using the .get() method.If the text isn't empty, it uses the qrcode library to build the code. Setting version=1 means we are generating a standard 21x21 grid. We set the box_size (how big each little black square is in pixels) and border (the white margin around the QR code). Finally, it creates the image and saves it to your project folder as temp_qr.png.
Crucial Step: Notice how we updated generate_btn to include command=generate_qr. This is called an "event listener"—it wires the physical button click directly to our Python function!
---
Step 4: Displaying the Result and Adding Error Handling
Saving an image to a hidden folder is cool, but a real commercial application displays the image right on the screen! Furthermore, what happens if the user accidentally clicks the button without typing anything? In our software development curriculum, we always teach "defensive programming"—ensuring your app doesn't crash when users make mistakes.
Let's use the Pillow (PIL) library to show the image, and Tkinter's messagebox to show a professional warning popup if the box is empty.
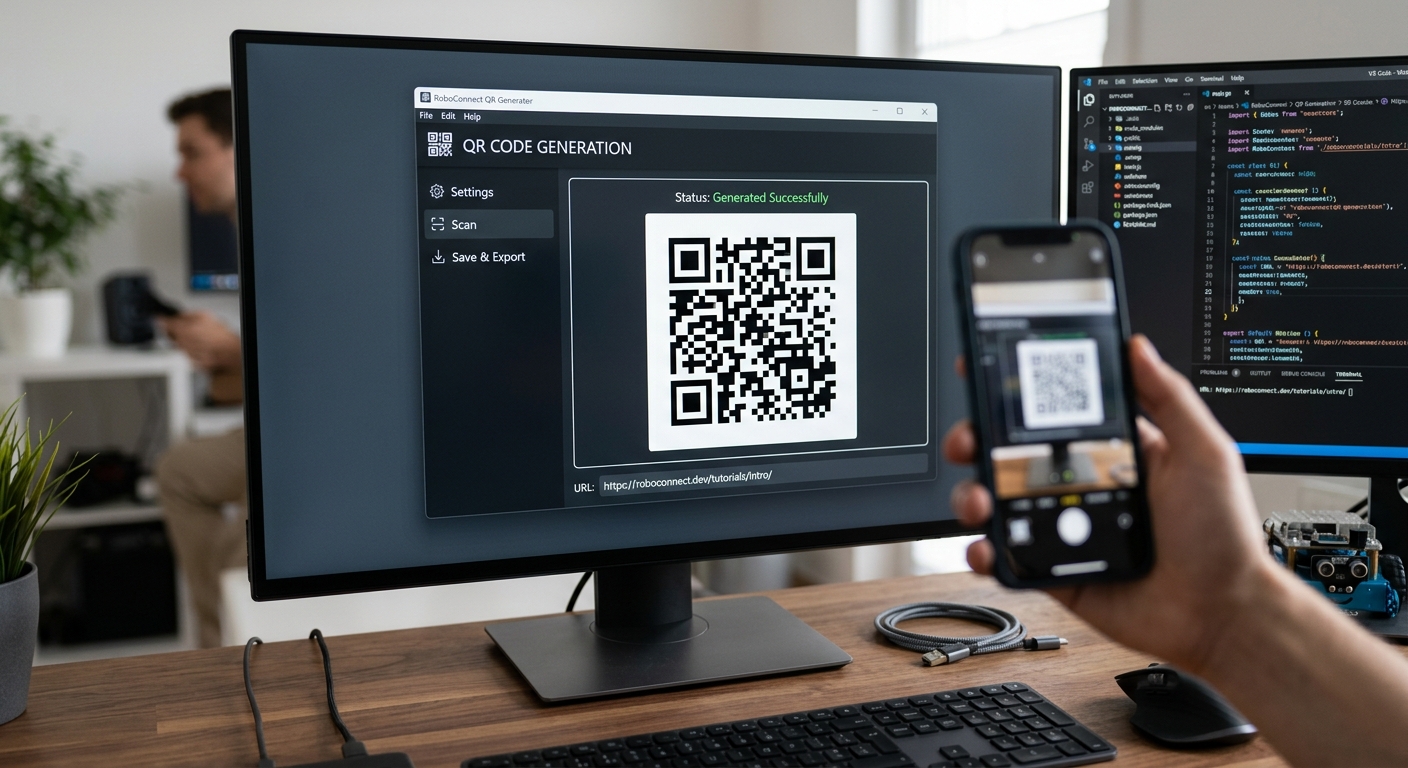
The fully completed application displaying a generated QR code in the center of the dark-themed window, ready to be scanned.
🧠 How It Works:
We importedmessagebox, Image, and ImageTk.
messagebox.showwarning triggers a popup warning instead of throwing an ugly terminal error. PIL) acts as a bridge. We open the image with Image.open(), resize it to 220x220 pixels, and convert it into a PhotoImage that Tkinter can understand.qr_label.image = tk_img. This is a crucial line! Tkinter has a known quirk where its "garbage collector" will automatically delete your image from computer memory right after the function finishes running, leaving you with a blank space. By explicitly saving the image to the label's image property, we force Python to keep it visible!---
🎉 Final Result
Congratulations! You have just built a complete, standalone Python Graphical User Interface application from scratch. You started with a blank canvas and transformed it into a piece of utility software that handles user input, generates complex data matrices, manages file saving, and manipulates images dynamically.
By following this tutorial, you've leveled up your coding skills significantly. You didn't just copy and paste; you built something real that you can show off to your friends and family!
🚀 Challenge: Take It Further
At AI Valley, we never stop at the basics. In our advanced classes, students take standard projects and elevate them by adding new, complex features. Try tackling these challenges on your own:
- Color Customization: Can you add buttons to the UI that let the user change the QR code from black to blue, red, or green? (Hint: look at the
fill_colorparameter in your code). - Save Location: Research the
tkinter.filedialogmodule. Allow the user to choose exactly where on their computer they want to save the final QR code, rather than always saving it as a temporary file. - Combine Hardware: If you are also taking Arduino or IoT classes, could you hook up a physical button to your computer (via Serial communication) that triggers the QR code generation in your Python app?
🏫 Learn More at AI Valley
Did you enjoy building this desktop application? AI Valley is the top-rated coding and robotics institute serving students across Chandigarh, Mohali, Panchkula, and our state-of-the-art lab headquarters in Zirakpur.
If you're searching for the best coding classes for kids in Chandigarh or a premier programming institute in the Tricity area, look no further. Our expert instructors teach hands-on Python, artificial intelligence, and robotics projects just like this one every single week. Whether your child is 7 years old taking their first steps in logical thinking, or 17 years old preparing for an engineering degree, we have customized tracks for every age and skill level.
Don't just consume technology—learn to create it! Visit aivalley.co.in today to explore our curriculum, or Enroll at AI Valley in our upcoming batches to start your journey in tech. Keep coding, keep creating, and we will see you in the lab!