
Build a Typing Speed Tester App: Step-by-Step Web Development Tutorial | AI Valley Panchkula
Welcome to AI Valley, the premier destination for tech education and the #1 rated institute for the best coding classes for kids in Panchkula! If you've been searching for a "coding institute near me Panchkula" to kickstart your web development journey, you are in the exact right place. At AI Valley, our teaching philosophy revolves around hands-on, project-based learning. Students from across the Tricity area build real-world, interactive applications every single week to bridge the gap between theory and actual software engineering.
Today, we are going to build a fully functional, interactive Typing Speed Tester App using HTML, CSS, and JavaScript. Whether you are an absolute beginner or looking to sharpen your frontend skills before joining our comprehensive web development course in Panchkula, this tutorial is designed to guide you step-by-step.
🎯 What You Will Build
You will create a sleek, modern web application that tests how fast a user can type. The app will feature:
This is exactly the kind of interactive, logic-based project our students build to master DOM manipulation and JavaScript fundamentals.
📋 Prerequisites & Materials
To build this project, you don't need any expensive software or high-end servers. All you need is:
💡 AI Valley Local Student Note: If you prefer learning in a highly equipped physical environment with in-person guidance, visit AI Valley's Panchkula lab! All hardware, high-end PCs, and expert mentorship are provided for our offline students.
---
Step 1: Setting Up the HTML Structure
The first step in any web development project is creating the structural skeleton using HTML. We need a main container to hold our app, a dashboard area to show the Timer, WPM, and Errors, a display box for the quote, and an input box for the user.
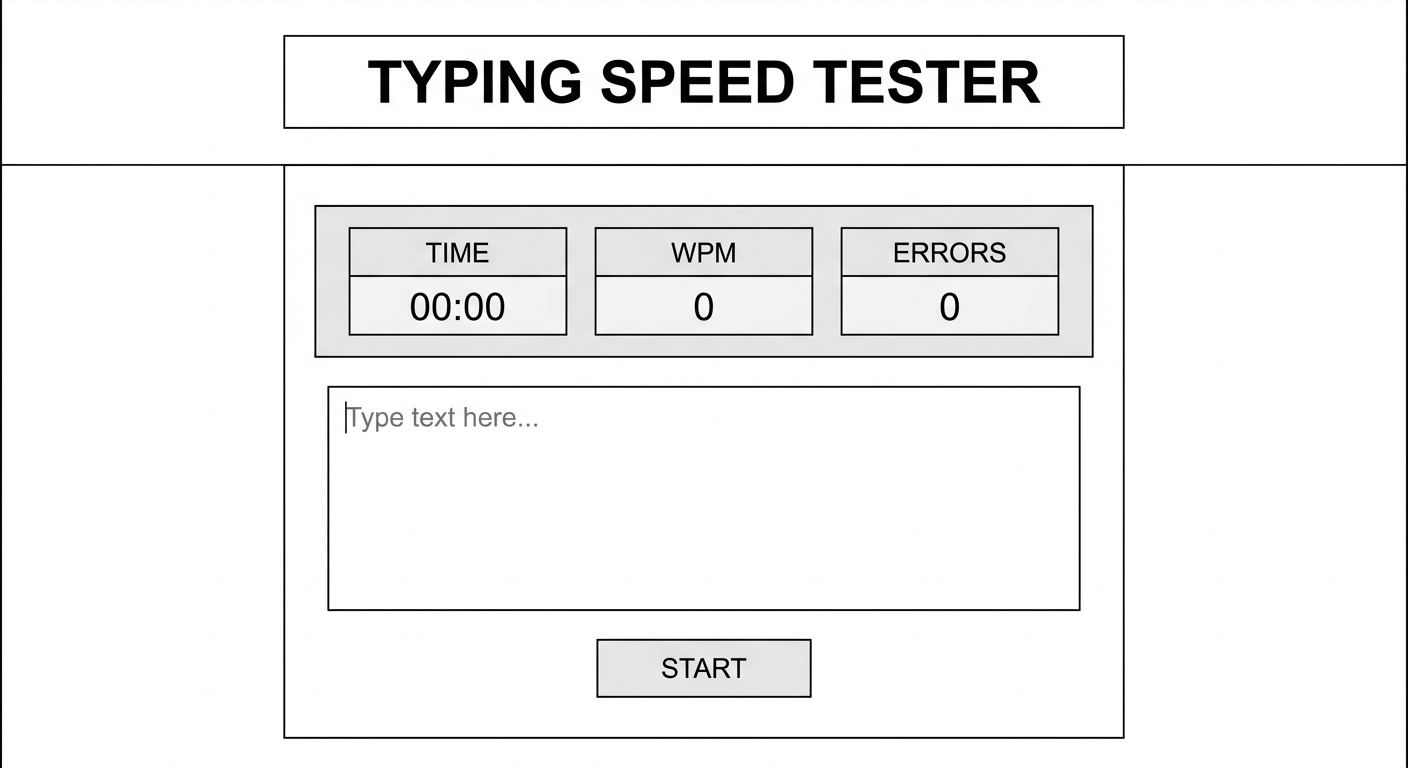
A wireframe or simple unstyled HTML text showing the title, stats dashboard, empty text box, and a start button on a plain white background
Create a file named index.html and paste the following code:
What this code does:
We use standard HTML5 boilerplate, including a meta description for basic SEO. Inside the , we created a main div with the class app-container. Inside this, we built a stats-board using semantic tags to hold our timer and scores. We also added a textarea for the user to type in (which is initially disabled to prevent typing before the timer starts), and a start button. At the bottom, we safely linked our JavaScript file. Building clean, semantic HTML is a core focus in our kids programming curriculum to ensure students learn industry standards from day one.
---
Step 2: Styling with Modern CSS and Flexbox
Next, we need to make our app look professional and engaging. Good UI/UX design keeps users on your page. This is exactly the kind of modern UI design our ambitious students from Zirakpur, Chandigarh, and Mohali build during their weekend web design modules.
A screenshot of the web app now styled with a dark, sleek background, glowing green accents, and beautifully centered flexbox layout
Create a file named style.css in the same folder and add this code:
What this code does:
We use CSS Flexbox in the body tag to perfectly center our app container on the screen, a crucial technique taught in the best coding classes for kids in Mohali and surrounding areas. We applied a dark, modern color scheme (Navy, Crimson, and Cyan) which is highly accessible and reduces eye strain. At the bottom, we defined .correct and .incorrect classes. We aren't using them in the HTML yet, but JavaScript will dynamically apply these to individual letters!
---
Step 3: Setting Up JavaScript Variables and State
Now comes the "brain" of our application. We need JavaScript to handle the logic, timers, and scoring.
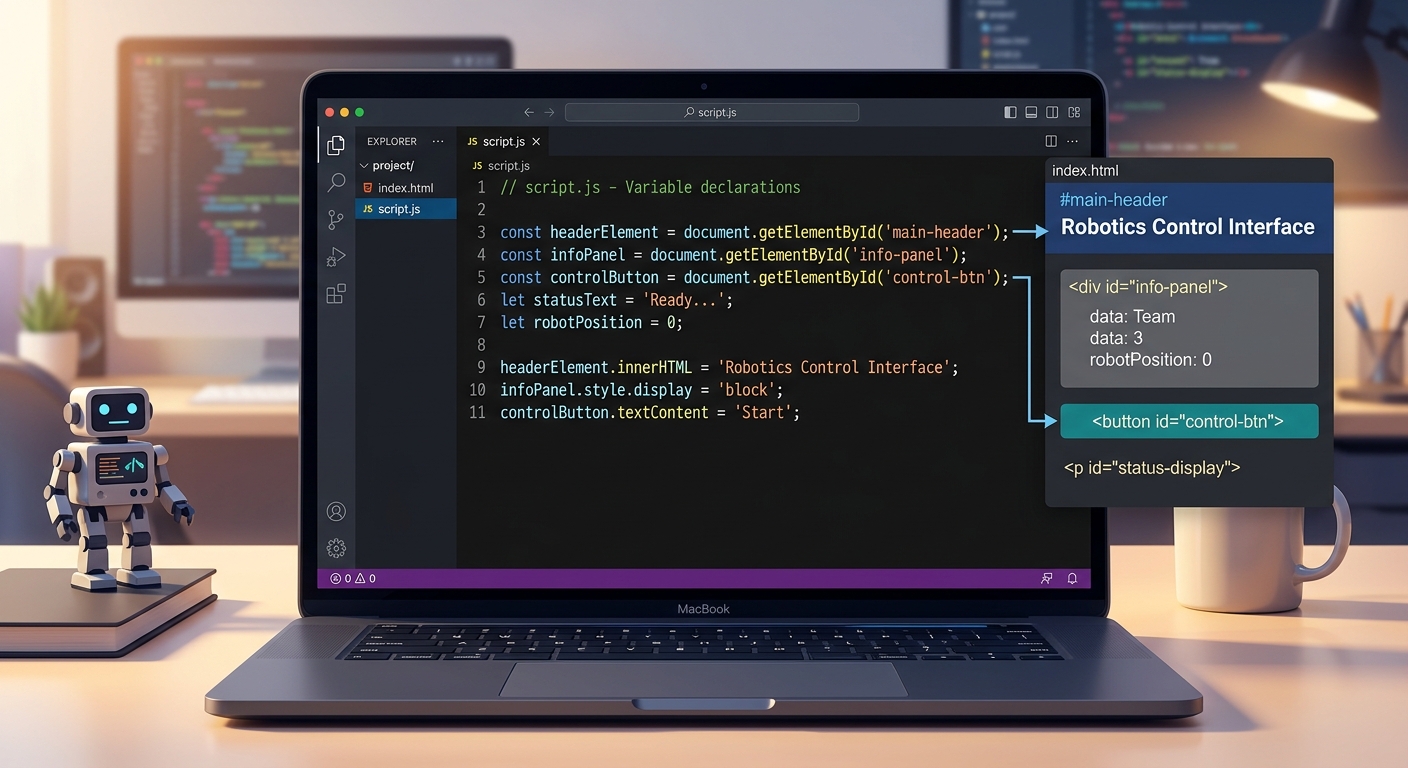
A code editor showing JavaScript variables being declared and linked to HTML element IDs using document.getElementById
Create a file named script.js and add this setup code:
What this code does:
First, we grab references to all our HTML elements using document.getElementById(). Next, we create an array of quotes. Finally, we set up our application "state" variables. Notice we added cumulativeErrors and cumulativeCharacters. Because a user might finish multiple quotes within 60 seconds, we need to track their progress continuously, not just reset it every time a new sentence appears!
---
Step 4: Displaying Quotes Dynamically
To color individual letters green or red, we cannot simply throw a block of text onto the screen. We must break the quote down into individual characters and wrap each one in a tag.
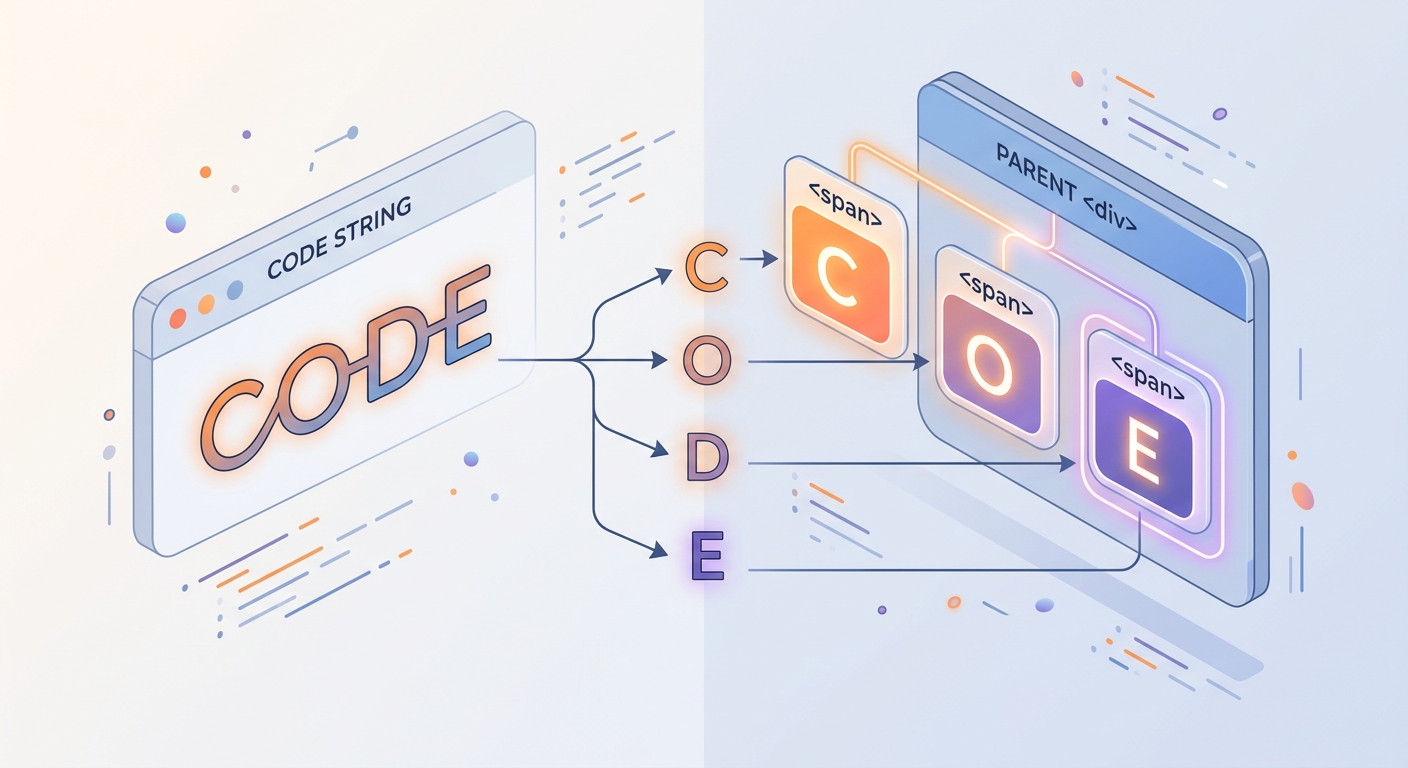
A visual representation of a string being split into individual span tags, showing 'C', 'O', 'D', 'E' as separate HTML elements
Add the following functions to script.js:
💡 AI Valley Expert Tip: Using.split('')converts our string into an array. We then use.forEach()to iterate through it, utilizingdocument.createElement('span')to build the DOM node dynamically. Teaching kids how to manipulate the Document Object Model (DOM) dynamically like this is why parents consistently rate us as the top coding classes in the region.
---
Step 5: Handling the Typing Logic
Now we need to check if the user is typing the correct letters in real-time. We will add an Event Listener that triggers every single time the user presses a key.
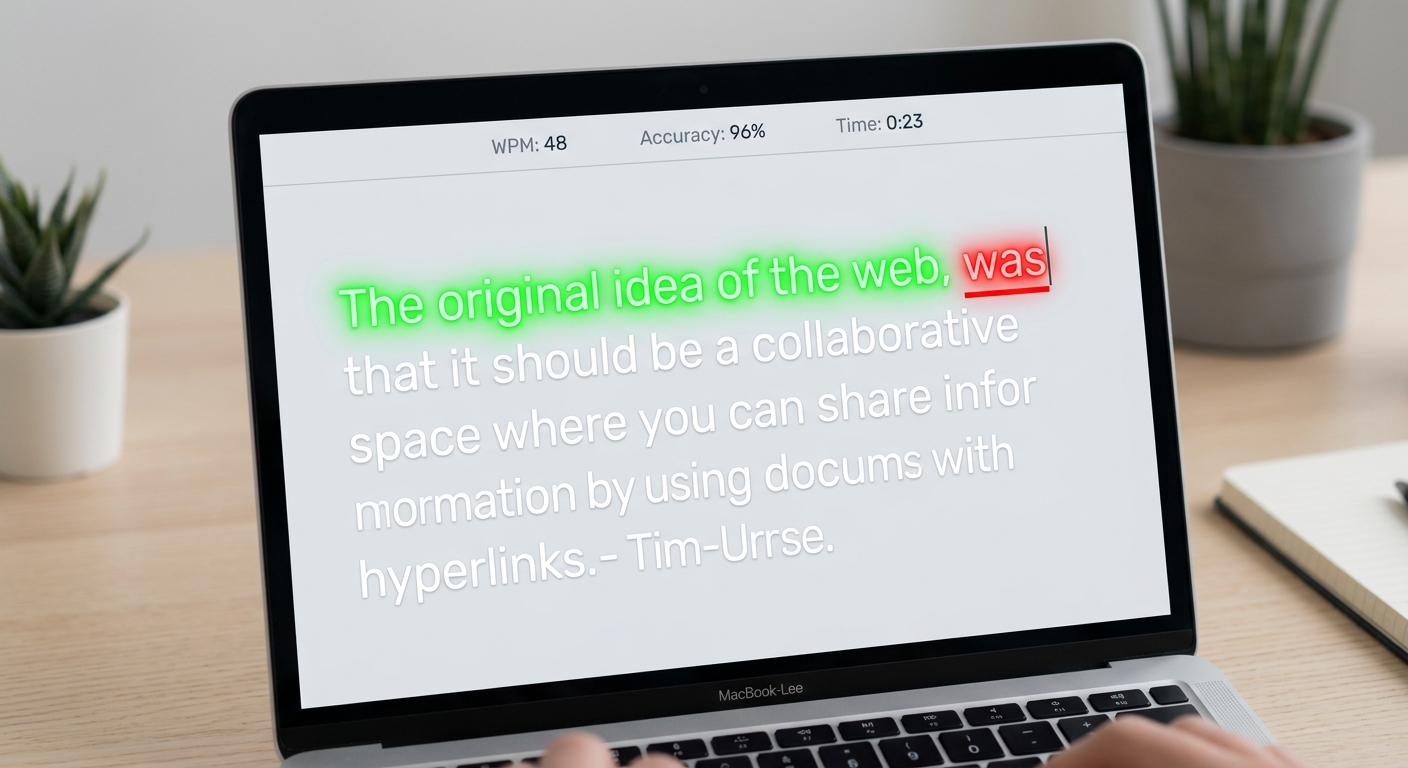
A screenshot of the app in action, showing the first few letters typed correctly in bright green, and a typo highlighted in red with an underline
Add this core logic to script.js:
What this code does:
Every time a keystroke happens, we compare the user's input array against the array on the screen. If characters match, we apply the .correct class. If they mismatch, we apply .incorrect and log an error. Once the user successfully completes the entire sentence, we add the character count to our global cumulativeCharacters tally and immediately trigger renderNewQuote() to keep the test moving!
---
Step 6: The Timer, WPM Calculation, and Game Loop
Finally, let's bring the app to life. We need a function to run the clock and calculate the Words Per Minute (WPM). The standard WPM formula is: ((Total Characters / 5) / Time in Minutes).
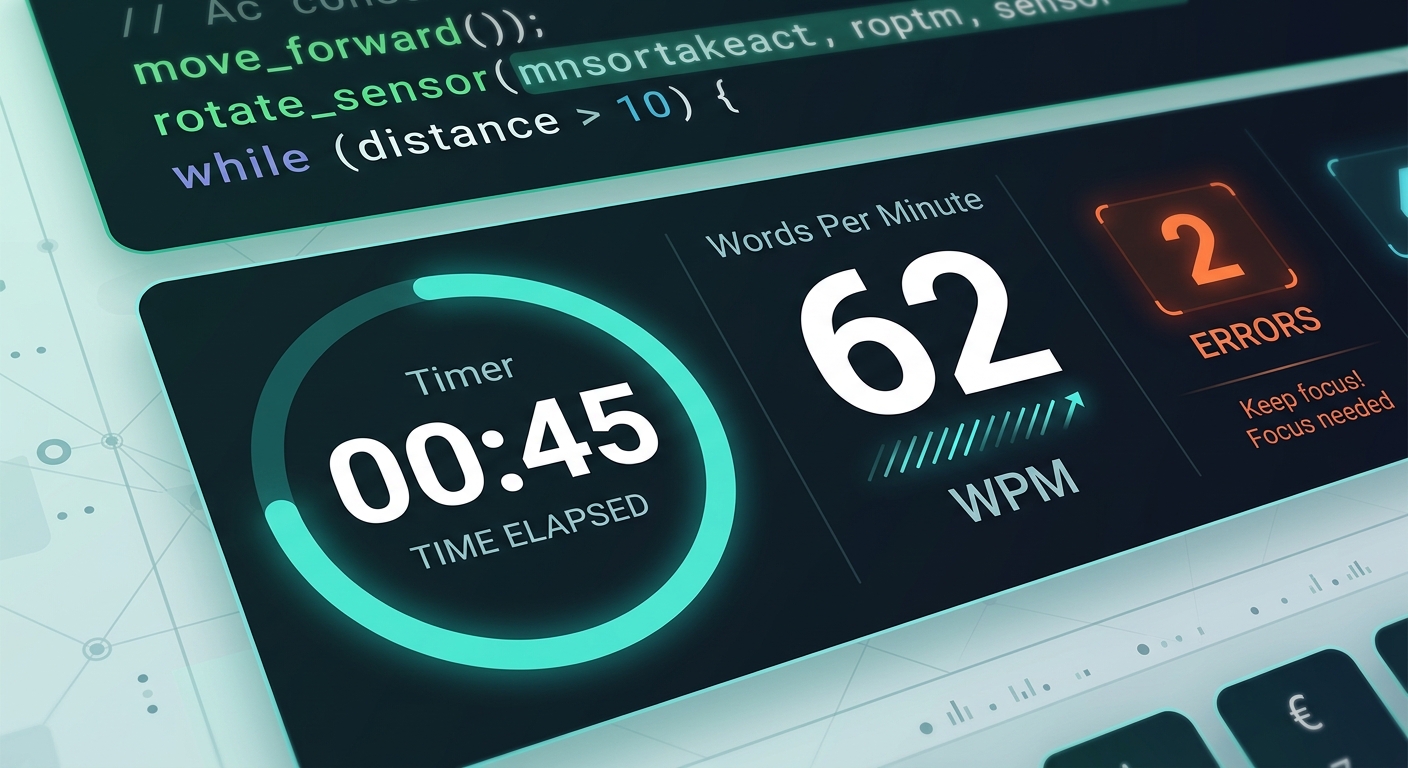
A dynamic shot of the stats board showing 45 seconds left, 62 WPM calculated, and 2 errors, indicating an active, ongoing typing test
Finish your script.js with this final block of code:
What this code does:
Clicking the "Start Test" button fires off resetGame() to zero out previous scores. We unlock the input field (disabled = false) and force the browser to focus on it (focus()). The setInterval function acts as our master clock, running updateTimer() every second. Inside updateTimer(), we calculate the WPM accurately across multiple quotes. When the clock hits zero, the input is disabled, and the button resets to "Restart Test".
🎉 Final Result
Congratulations! You have successfully built a fully interactive Typing Speed Tester from scratch. Through this project, you have mastered DOM manipulation, event listeners, CSS Flexbox, and complex JavaScript interval logic. These are the exact problem-solving skills professional software engineers use daily.
Projects like this are the backbone of the superior STEM education Tricity students receive at AI Valley. By building real applications instead of just reading textbooks, concepts like arrays, intervals, and conditional logic become second nature.
🚀 Challenge: Take It Further
Want to make your project even better? Try adding these features to practice independently:
fetch() to pull infinite, real-world quotes automatically instead of using a hard-coded array!🏫 Start Your Tech Journey at AI Valley Today
AI Valley is the top-rated coding and robotics institute proudly serving students in Panchkula, Zirakpur, Chandigarh, and Mohali. We provide elite, future-ready tech education designed to turn technology consumers into technology creators.
Whether you are seeking the ultimate web development bootcamp, advanced Python mastery, or hands-on robotics training, we have the perfect learning path for you. Our expert instructors adapt to every student's pace, ensuring concepts actually stick.
Ready to build something amazing? [Visit aivalley.co.in](https://aivalley.co.in) to explore our curriculum, or stop by our physical campus to enroll at AI Valley and take your first free trial class today!